Tutorial

Tutorial: Retopo for Skinning by Jeremy Ernst

Learning how to retopologize a model to make skinning easier was not something I started doing until later in my career, which is unfortunate because it can be such a time saver!

In this quick video tutorial, I’ll go over the basics of Maya’s retopology tools and how you can use retopology to build yourself a mesh that is quicker and easier to skin weight, then transfer those weights over.

Note: There are many methods of transferring skin weights. I personally like the utility found in Zoo Tools, because it is easiest in that I do not have to create a skinCluster before copying weights. That said, if you want to stick with the tools Maya provides, there are plenty of options available.

[Tutorial] Reference Grouping Tool by Jeremy Ernst

I had someone ask me about how to go about creating a tool that would allow you to group references to unload/load with one click, any references in that group. This person was looking to learn a bit more python, so I recorded my process as I built the tool.

The recordings are not edited, so I do stumble through some parts, and the code is probably not as clean as it could be. (Also used my shitty headset mic instead of my good setup, sorry about that).

This is what the final result looks like. Each object is a referenced file. Those references can be added to groups, and all references in a group can be loaded or unloaded with a click.

Below are the video recordings of me building the tool.

Full script:

[Tutorial] Adding Geometry to Existing Blendshapes by Jeremy Ernst

I had a question recently about a situation where a bunch of blendshapes were made, and now hair cards needed to be added to the mesh, and if it was possible to retain all of those blendshapes and add that new geometry.

The answer is yes!

So here is a simple example where we have a head and we have a blendshape that opens the mouth.

Now, some hair cards get added and we want those to deform with our blendshapes and be attached to the mesh (Assuming this is a realtime application where wraps wouldn’t be applicable).

In this case, we need that new beard geometry to deform with the blendshape. Rather than use a wrap, I’m going to create a skin cluster here instead so I can paint the weights. In this gif below, I create a joint, simply to get a skinCluster going and bind the beard to the joint. I then add the head mesh as an influence to the skinCluster, making sure Use Geometry is checked. Now, in the skinCluster, I can turn on UseComponents, and the mesh will deform the beard, much like a wrap, except now we can actually tweak the weighting of that deformation.

Here, I can tweak the weights of that deformation so the mustache area isn’t stretching.

Here are the steps of what’s happening in the gif below to get our new geometry added and deformed to our blendshapes:

(If you have a lot of blendshapes, scripting this would be ideal). For each blendshape, the process would be:

  • Move each blendshape mesh back on top of your main mesh.

  • Turn that blendshape on

  • Duplicate the beard geometry as it gets deformed by the blendshape

  • select the duplicated geometry and the blendshape mesh and combine. The combination order must be the same on every mesh. In this case, I will always select the beard, then the head, then hit combine.

  • Don’t delete history yet until all blendshapes are done. Rename the new combined mesh.

Once that is done and you have combined meshes for all your shapes, delete history on them, then do the same combination on the main mesh and the beard there (selecting in the same order as before, beard then head). Now when I hook my blendshapes back up, the new geometry is attached and nothing is deforming oddly.

That’s it!

Joint-Based Muscle Setup by Jeremy Ernst

I wanted to test out a simple solution for adding more volume preservation and movement using just joints and a simple squash/stretch segment setup. The idea was to place joint segments where the muscle would tend to sit, then utilize a single chain IK solver combined with squash and stretch on the base joint to get volume preservation.

For example, the pectoral muscle attaches along the sternum/clavicles, and inserts itself near the bicep.

pectoral.jfif

Because we’re dealing with a simplified skeleton, the joint segment is going to be parented under the relevant spine joint, with the end of the segment landing somewhere on the upper arm. (In my quick test, I didn’t place it super accurately to the muscle, but the desired result is achieved regardless). The script (posted below) will create the setup and parent the IK handle under the insertion parent, the upper arm in this case.

Combined with using NgSkinTools, this was a really quick way of achieving some decent joint-based volume preservation.

This was the simple script I wrote to setup the stretchy segments for the muscles:

The final result:

More fun in PySide! by Jeremy Ernst

This week's adventure involves doing something that you would think would be super simple, but instead involves image manipulation! I wanted to have the icons of the tabs of my animation control picker darken if they were not selected. With the image below, it isn't as clear as it could be as to which character tab is currently active. I added some height margins, but it would sure be a whole lot clearer if the images weren't the same value!

animPicker.png

It became evident that I was going to need to take some of the knowledge from last week, and apply that to this problem. So let's drive into that.

First, I hooked up the tabWidget (currentChanged) to a new function that would do the image manipulation and set the icon. In this new function, the first thing I do is get the total number of character tabs, as well as get the currently selected tab.

As I loop through the tabs, if the tab I am on in the loop is the currently selected tab, I access a property on the tabWidget I created that will give me the QIcon in memory, so that I can set the tab icon back to the original image on disk.

If the tab is not the currently selected tab, I get the QIcon of the tab, then get the pixmap of the QIcon, and then convert that to a QImage.

This is the fun part! Now, I loop through the x and y positions of the image, sampling the rgb value of the pixel at those positions, darken that value using QColor's darker function, and then set the pixel on our temp QImage at the same x,y location to that new darker color. This continues until all pixels are read, darkened, and then set, on the new QImage.

Now all that is left to do, is to convert this QImage to a QPixmap, and set the tab icon to that new, darkened image (which only exists in memory, not on disk).

The end result now gives me exactly what I was looking for!

Much more clear!

Much more clear!

Here's the full function as well:

Hope this helps anyone else looking to do something similar! 


Customizing QToolTip by Jeremy Ernst

This is not a post about style-sheets. I wish it were that easy to add a background image to a QToolTip, but it's not.

I wanted to look into adding background images to tool-tips. The first thing I found was that you can use html as your tool-tip text to display an image in the tool-tip. But, I didn't want to just display and image. I wanted to display an image with text on top of it.

Here's how you can simply display an image as your tool-tip using HTML:

With this method, I would need to author tons of images just for tool-tips, which is crazy. I started digging into generating my own image using QPainter. While looking at the documentation, I found that QPainter had all sorts of handy functions to draw things, and this could all then be saved to a QPixMap. This worked really well! I supply an image to paint as the background, then draw text on top, then save that out as an image. I was pretty stoked when I got to this point. Here's the code for that:

My intention was to have 1 tool-tip image. It gets overwritten anytime a tool-tip is requested with the new image. However, when I would have widgets call on this method to generate their tool-tip image, it would only happen when that interface was instantiated, meaning the singular tool-tip would get stomped, and all widgets would end up with the same tool-tip.

The next idea was to give this method a unique filename to save out. But then I could end up with hundreds of tool-tip images, which isn't really much better than authoring my own. I really wanted the tool-tip image to be generated when a tool-tip was requested by a widget. To do this, I need to intercept the ToolTip QEvent. Okay, fine. How can I do this?

I created another function that is my own tool-tip event handler.

Now for the last steps. When creating a widget, I reassign the widget's event method to this method instead.

The tooltip_text property holds the text I want displayed on top of the image. The tooltip_size property, which is optional, determines which background image gets used. The first line, which is where this button's event method is reassigned, passes in itself as an argument so that I can query the above properties and set the tool-tip on that widget. This means there is only ever 1 tool-tip image, and it gets generated whenever a ToolTip event is intercepted (if that widget has reassigned its event method).

Below is what the end result looks like. Keep in mind it's the same image file being displayed on all of the buttons.

tooltips.gif

This was one of those things where I had the idea, and went down the rabbit hole until I figured it out. Is it super useful? Not really. But it adds an extra 5% of polish to my tool-tips I suppose!

Python is awesome by Jeremy Ernst

I'm probably going to sound like an idiot, but I was working on something today, and found a solution that I was really excited about and thought I'd share. For experienced programmers, this is probably a big duh, but I was pretty stoked.

Okay, so the task I was working on was adding a control's spaces to the context menu in the control picker.

The task was pretty straightforward. When creating the menu initially, I check to see if a control has spaces, and if it does, add an action to the menu for each space. This worked well!

The original implementation in the torso's function that builds the picker. If the control was the body_anim, get its spaces, and add actions to the button class's menu.

The original implementation in the torso's function that builds the picker. If the control was the body_anim, get its spaces, and add actions to the button class's menu.

Here it is in action.

Here it is in action.

However, if I created a new space, it wouldn't show up in the menu unless I re-launched the UI. This is fine, but I wanted to see if I could generate the menu on the fly when the context event was called.

The picker button is its own class that creates its context menu. This class has the event for actually displaying the menu when you right click. I did a test and added a function to the button class that the contextMenuEvent would run first. That worked as expected.

The button class's function for launching the contextMenu and a test function to run before-hand.

The button class's function for launching the contextMenu and a test function to run before-hand.

Now, here is where I add items to the button class' menu in the torso class. The 'button.menu' refers to the button class instance and the menu of the button class. So it's just going through and adding the menu items. This is where I initially had it add the spaces, but because this function is only run when the animation picker class gets instantiated, it doesn't update.

Function in torso class that adds items to the button class's menu.

Function in torso class that adds items to the button class's menu.

I decided to try something, and to my amazement, it worked. Now, I don't have a ton of formal training in programming, so again, this might be stupid, but in the function that builds the picker for the torso where I was initially adding spaces, I take that button instance and reassign its addSpaces function to my torso's new addSpacesToMenu function.

Reassigning the button class's addSpaces function to the torso's addSpacesToMenu function

Reassigning the button class's addSpaces function to the torso's addSpacesToMenu function

The torso's addSpacesToMenu function that the button's addSpaces function now executes.

The torso's addSpacesToMenu function that the button's addSpaces function now executes.

Now, every time the context menu event is called, it runs the torso's addSpacesToMenu function before showing the menu, always ensuring any new information is added. I thought this was pretty neat!

Final implementation. Creating a new space now gets added to the context menu without relaunching the animation interface.

Final implementation. Creating a new space now gets added to the context menu without relaunching the animation interface.

Hopefully this is helpful to someone!

Digital Tutors Tutorial Released! by Jeremy Ernst

Character Skin-Weighting Techniques in Maya

Throughout these lessons, we will build a skeleton for our character model, learn about joint orientations and their impact on deformations, and skin-weight the entire character from beginning to end. We'll cover things to look for in the model that will cause issues with deformation down the road. We'll even go over editing the model to fix any errors that will inhibit us. Many skin-weighting techniques and tools are discussed and used throughout the course. You'll also learn how to transfer weights between meshes, how to mirror skinning on asymmetrical meshes, what to look for when skinning to ensure the best deformations, and we'll finish by creating a range of motion(ROM) animation and putting our character in a pose, which will test our skinning out. By the end of the course, you should have a firm grasp on the techniques needed and used to get great looking deformations on your characters.

JSON vs. cPickle by Jeremy Ernst

Hey all!

Just a quick mini tutorial/blurb about using JSON. In the first version of the Animation and Rigging Toolkit, I used cPickle, because I didn't know any better :) If you're unfamiliar with cPickle and JSON, they are both Python modules (in this case) that allow you to write out Python data, like lists or dictionaries, and have them be read back in as that data type, instead of the usual string you'd get back from file.readlines().

There are a few reasons to switch to json over cPickle. First, as I learned with the tools, cPickle and source control do not mix well. cPickle seems to be very dependent on its new line/line ending characters staying intact, and Perforce would corrupt this by changing the line endings in the file, unless you set your line endings setting in P4 to use something like 'unix' instead of 'universal line endings'. This is somewhat okay in a studio setting, it's an easy enough thing to control, but when tools are mass distributed, this can become a nightmare. The other downer of cPickle is that the file is not human readable. Depending on what you're trying to save out, this might be acceptable. I found for saving out poses or templates or animation data though, that being able to open, read, and edit the data inside the file would have been mighty useful!

So, onto JSON! The functions for both are very similar, and they do very similar things, but JSON seems to be more forgiving with not getting corrupted when using source control, and it's human readable, so at the very least, one could edit the file to fix any possible issues.

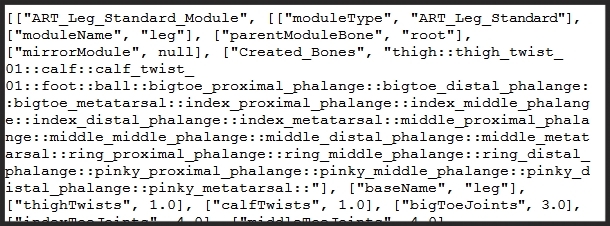
To use json to write out a list of data, first I created the list I wanted to save out, then:

I use maya's fileDialog2 command to grab the name of the file the user wants to save, create that file (or open if it exists), and then use json.dump(data, f) to dump my list (data) into my file (f). If you're wondering what "*.template" is, with text files you can save with any arbitrary file extension you want. In this case, since I was saving out data for a rig template, I made a template file extension.

Here's a snippet of what that file looks like if I open it in wordpad:

To load this data back in as a list that python understands, you can simply use the following:

Super short and sweet. Again, using Maya's fileDialog2 command to get the file to open from the user, then opening the file, using json.load() on that file (storing into the variable data), and then closing the file! Now you can iterate over the list, data, to get whatever it was you needed(in this case, template information).

If you've looked at the json documentation, you'll notice there are two load functions: load() and loads(). The load() function is what you want to use if you are passing in an actual file, whereas the loads() function is what you'd use to pass in a string/unicode. All of the examples I had seen online before looking that up were using loads(), but they weren't actually passing in a file object, so when I tried using it, it would error out! 

That's pretty much it! I hope someone finds this useful, as it's now my go to module for saving out data!